Getting Started
Installation
Click below to download and install LumoTray from the Microsoft Store
First Run
When launching for the first time, you will see a welcome screen where you can:
Select light/dark mode (default is auto-detected from Windows)
Set it to run on Windows startup (default is on)
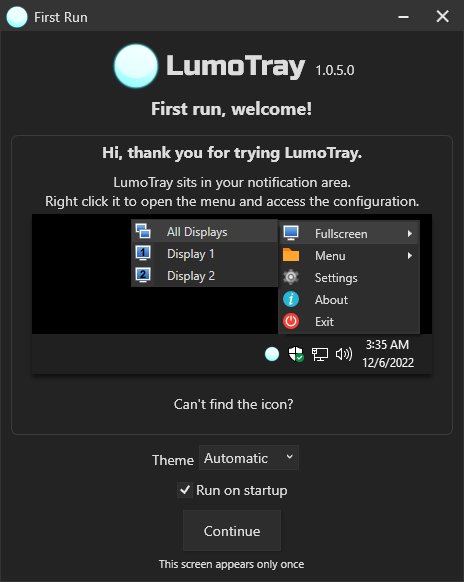
After clicking the Continue button you should get a windows notification indicating that LumoTray is now running.
Note
The welcome screen and the first notification is shown only once after installation. LumoTray starts silently on subsequent launches.
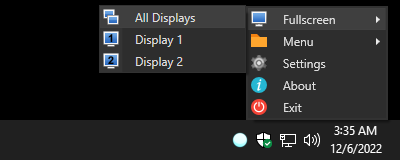
Right click the icon to access the context menu.
Note
Because LumoTray allows you to use and customize both single-click and double-clicking on the tray icon, the single click action will only fire after a small delay needed to distinguish between them.
At this point you should go into the Settings menu and configure LumoTray to your liking.
Icon Missing
If you can’t find the icon, Windows has most likely hidden it from view and you’ll have to click the up caret button to see it.
For an easier experience, you can drag the icon directly to a visible part of the notification area to keep it visible.